ucl exercises pdf

A comprehensive UCL Exercises PDF guide provides structured workouts for rehabilitation, focusing on strengthening, mobility, and injury prevention. It includes detailed routines and visual instructions for optimal recovery.

Overview of UCL Injuries

UCL injuries, affecting the ulnar collateral ligament, are common in athletes involved in repetitive throwing or overhead activities. These injuries range from partial tears to complete ruptures, often causing elbow pain, instability, and limited mobility. They can result from acute trauma or gradual wear and tear due to repetitive stress. Symptoms include persistent pain during throwing, swelling, and reduced strength. Accurate diagnosis is crucial, often involving physical exams and imaging. Understanding the severity of UCL injuries is key to developing effective treatment plans, whether through conservative rehabilitation or surgical intervention. Early detection and appropriate management are vital to prevent further damage and ensure a successful recovery.

Importance of Exercise in UCL Rehabilitation

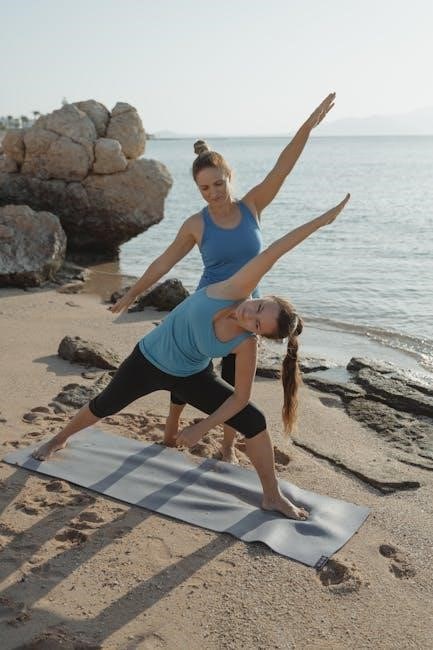
Exercise plays a critical role in UCL rehabilitation by promoting healing, restoring function, and preventing further injury. Controlled stressors and progressive resistance exercises help strengthen the ligament and surrounding muscles, enhancing stability and flexibility. Early mobilization and strengthening routines are essential to avoid stiffness and improve range of motion. These exercises also address secondary issues, such as scapular and shoulder imbalances, which are common in UCL injuries. A well-structured exercise program can reduce pain, minimize swelling, and restore athletic performance, particularly for individuals returning to throwing or overhead activities. Consistency and proper progression are key to achieving optimal outcomes and preventing re-injury.

Benefits of Using a PDF Guide for UCL Exercises

A UCL Exercises PDF guide offers a convenient and accessible resource for rehabilitation. It provides clear, visual instructions and demonstrations, making it easier for patients and therapists to follow structured routines. The guide often includes progression criteria, ensuring exercises are advanced safely and effectively. Portable and easy to reference, a PDF guide allows for consistent practice at home or in clinical settings. It also serves as a tracking tool for rehabilitation milestones, helping users monitor their progress. By organizing exercises into categories like mobilization, strengthening, and advanced drills, a PDF guide streamlines the recovery process, ensuring a comprehensive and efficient approach to UCL rehabilitation.

Types of UCL Injuries

UCL injuries are categorized into partial and complete tears. Partial tears involve incomplete ligament damage, while complete tears result in a full rupture, often requiring surgical intervention.

Partial UCL Tears

A partial UCL tear involves incomplete damage to the ligament, often causing pain during throwing or repetitive arm movements. Nonoperative treatment is typically preferred, focusing on strengthening exercises, low-load stretches, and scapular stabilization. Early mobilization and controlled stressors are emphasized to promote healing without surgery. Rehabilitation protocols may include wrist flexion/extension, supination/pronation, and radial/ulnar deviation exercises to improve joint stability. Progression is criterion-based, with gradual increases in resistance and difficulty. The goal is to restore strength, endurance, and neuromuscular control, allowing athletes to return to their sport safely. Compliance with rehab protocols and avoiding aggravating activities are crucial for successful recovery.

Complete UCL Tears

A complete UCL tear involves a full rupture of the ligament, often requiring surgical reconstruction. Postoperative rehabilitation focuses on restoring strength, stability, and function. Protocols typically include controlled stressors and progressive resistance exercises, with early initiation of weight-bearing activities. Exercises such as the Throwers Ten Program, biceps/triceps exercises, and plyometric drills are commonly incorporated. Use of a hinged elbow brace is standard, with gradual increases in range of motion and resistance. The goal is to enable athletes to return to full sports participation, such as competitive cheerleading or throwing sports, within 3-4 months. Compliance with rehab timelines and avoiding overloading the elbow are critical for successful recovery and preventing re-injury.

Role of Exercises in UCL Rehabilitation

Exercises play a crucial role in restoring strength, stability, and function after UCL injuries. They promote healing, improve mobility, and prevent further damage through controlled stressors and progressive resistance.

Nonoperative Rehabilitation

Nonoperative rehabilitation for UCL injuries focuses on a criterion-based progression program tailored to individual needs. The primary goals include decreasing inflammation, improving range of motion (ROM), and minimizing pain and swelling. Early stages involve passive elbow ROM exercises, soft tissue mobilizations, and the use of a hinged elbow brace to protect the ligament. Patients progress through phases based on their compliance, tissue quality, and injury severity. Strengthening exercises for the elbow flexors and extensors, as well as scapular and core stability, are introduced gradually. Wrist exercises, such as flexion/extension and supination/pronation, are also incorporated to enhance overall arm function. A structured UCL exercises PDF guide ensures clarity and adherence to the rehabilitation protocol, promoting a safe and effective recovery process.

Postoperative Rehabilitation

Postoperative rehabilitation following UCL reconstruction involves structured protocols to ensure proper healing and functional restoration. Surgical techniques like the figure of 8 (modified Jobe procedure) and the docking procedure guide the rehabilitation process. Controlled stressors and progressive resistance exercises are applied to promote ligament healing. Early weight-bearing exercises are initiated, increasing in difficulty and duration, with the goal of returning to full sports participation within 3-4 months. Traditional rehabilitation focuses on shoulder and scapular strengthening, along with wrist exercises like flexion/extension and supination/pronation. A comprehensive UCL exercises PDF guide provides detailed instructions, timelines, and goals for postoperative care, ensuring a safe and effective recovery process tailored to the athlete’s needs.

Exercise Categories for UCL Rehabilitation

UCL rehabilitation exercises are categorized into early mobilization, strengthening, and advanced drills. These structured routines aim to restore flexibility, build strength, and enhance functional movement progressively.

Early Mobilization Exercises

Early mobilization exercises focus on restoring elbow range of motion and reducing stiffness post-injury or surgery. Gentle wrist and forearm movements, such as flexion, extension, and pronation, are often included. Passive elbow extensions and soft tissue mobilizations are commonly prescribed to enhance flexibility. These exercises are typically performed with a hinged elbow brace, gradually increasing the range by 10 degrees weekly. The goal is to minimize pain and swelling while promoting healing. Patients are encouraged to perform these exercises consistently, as early mobilization is crucial for preventing long-term stiffness and preparing the joint for more advanced strengthening phases later in rehabilitation.

Strengthening Exercises

Strengthening exercises are essential for restoring elbow and forearm function after a UCL injury. These exercises target the flexors, extensors, and rotators of the elbow and wrist. The Throwers Ten Program is commonly used, focusing on biceps curls, triceps extensions, and wrist supination/pronation. Resistance bands or light weights are often incorporated to build strength and endurance. Progression to advanced drills, such as plyometric throwing exercises, helps improve power and neuromuscular control. Strengthening exercises are typically introduced after the initial healing phase, with a gradual increase in intensity to avoid overloading the ligament. Consistency and proper form are critical to ensure effective rehabilitation and prevent re-injury.

Advanced Drills and Plyometrics

Advanced drills and plyometrics are introduced in later stages of UCL rehabilitation to enhance power, speed, and functional movement. These exercises mimic sports-specific actions, such as throwing or overhead motions, to prepare the athlete for return to play. Plyometric exercises, like single-arm plyometric throws and medicine ball drills, are typically incorporated around weeks 10-12 of rehabilitation. These high-intensity movements improve neuromuscular control and explosive strength. Progression is gradual, ensuring the athlete can handle increased stress on the UCL without discomfort. Proper form and technique are emphasized to avoid re-injury. These drills are crucial for bridging the gap between strengthening exercises and full sports participation, ensuring a safe and effective return to activity.

Creating a Comprehensive UCL Exercises PDF Guide

A well-structured UCL Exercises PDF includes detailed visual instructions, progression criteria, and timelines. It ensures clarity and safety, catering to varying rehabilitation needs and goals effectively.

Elements of an Effective Exercise Guide

An effective UCL Exercises PDF guide should include clear, step-by-step instructions for each exercise, ensuring proper form and technique. It should incorporate visual aids like diagrams or photos to demonstrate movements accurately. Additionally, the guide must outline specific goals and progression criteria, allowing individuals to track their improvement. Including timelines helps users stay on schedule, while safety precautions prevent overexertion. A well-organized layout enhances readability, making the guide user-friendly. By addressing these elements, the PDF ensures a safe and efficient rehabilitation process tailored to individual needs, promoting optimal recovery and return to activity.

Visual Instructions and Demonstrations

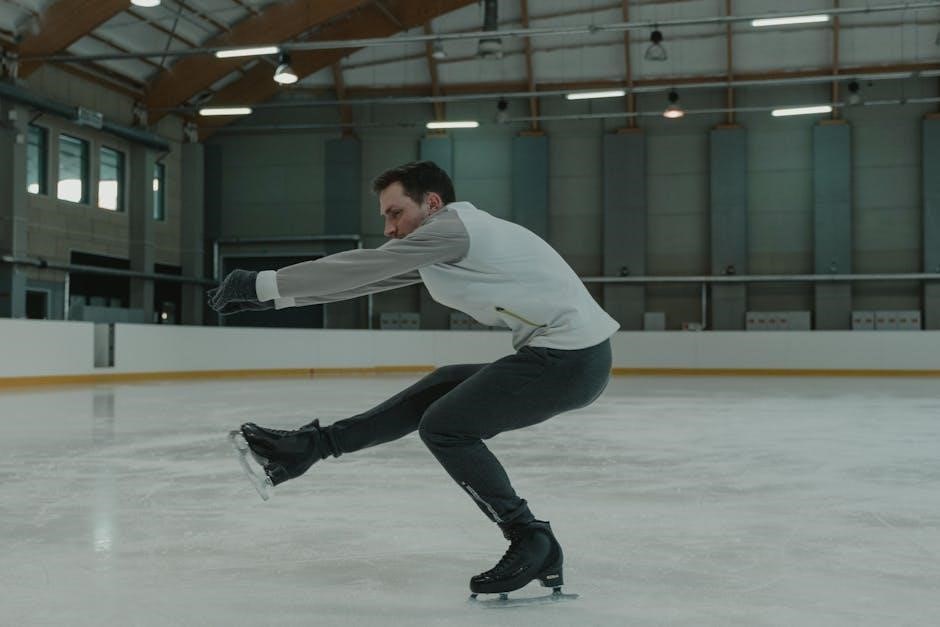
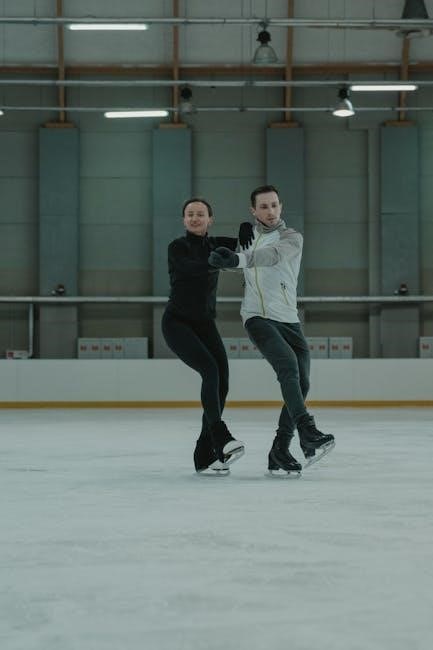
Visual instructions and demonstrations are crucial in a UCL Exercises PDF guide, as they help users understand proper form and technique. High-quality images, diagrams, or videos should accompany each exercise, detailing starting positions, movements, and endpoints. Clear visual cues, such as arrows or highlighted muscle groups, can enhance comprehension. Step-by-step photos or screenshots from videos ensure that complex movements are broken down into manageable parts. For example, exercises like resisted wind-up drills or plyometric throws can be better understood with visual guidance. This approach minimizes the risk of incorrect form, reduces injury potential, and ensures exercises are performed effectively. Visual aids also cater to different learning styles, making the guide more accessible and user-friendly.

Progression Criteria and Timelines

Progression criteria and timelines in a UCL Exercises PDF guide ensure a structured and safe rehabilitation process. Phases are typically divided into early mobilization, strengthening, and advanced drills, with specific goals for each stage. For example, the first 0-2 weeks focus on reducing inflammation and improving ROM, while weeks 4-6 emphasize strengthening exercises like the Throwers Ten Program. By weeks 10-12, athletes progress to plyometric drills and high-speed throws. Progression is based on achieving specific milestones, such as pain-free movement, full ROM, and adequate strength. Timelines may vary depending on injury severity and individual recovery rates. Adhering to these criteria ensures a gradual and effective return to activity, minimizing the risk of re-injury and optimizing outcomes.

Exercise Progression and Monitoring

Exercise progression and monitoring are crucial for safe and effective UCL rehabilitation. Criteria-based advancements ensure activities align with recovery milestones, preventing overload and promoting optimal healing.

Criterion-Based Progression

Criterion-based progression ensures rehabilitation advances based on measurable goals, such as strength, pain levels, and range of motion. This approach prioritizes individual recovery pace, avoiding rigid timelines. Patients progress when specific criteria are met, such as achieving full elbow mobility or demonstrating pain-free strength. Factors like age, injury severity, and compliance influence progression rates. Controlled stressors and progressive resistance exercises are applied to enhance tissue resilience without overloading. This method minimizes risks of re-injury while optimizing functional recovery. Clear benchmarks guide clinicians and patients, ensuring a structured and adaptive path toward full rehabilitation and return to activity.

Tracking Rehabilitation Milestones

Tracking rehabilitation milestones is essential for monitoring progress and ensuring a safe return to activity. Key metrics include pain levels, strength, and range of motion. Regular assessments help identify improvements or plateaus, guiding adjustments to the exercise program. A structured UCL Exercises PDF guide often includes checklists or logs for documenting progress. Patients and clinicians can track achievements, such as regaining full elbow mobility or advancing to higher resistance levels. Visual instructions and clear timelines in the guide aid in understanding expectations. By focusing on measurable milestones, individuals can stay motivated and ensure they are meeting rehabilitation goals effectively. This systematic approach supports long-term recovery and performance.

Safety and Precautions

Ensure proper warm-up and avoid overexertion to prevent further injury. Use protective gear like elbow braces and follow guidelines to minimize strain during exercises.

Common Mistakes to Avoid

When following a UCL exercises PDF, avoid overexertion, as it can worsen injuries. Ignoring pain during workouts is a common mistake; stop immediately if discomfort arises. Improper form and rushing through exercises can lead to poor results or further damage. Neglecting to warm up or cool down is another oversight, as it increases injury risk. Additionally, skipping recommended rest periods can hinder recovery. Always consult a professional before starting any program, especially post-surgery or with severe tears. Adhere strictly to the guidelines to ensure safety and effectiveness.

When to Seek Medical Attention

Seek immediate medical attention if you experience severe pain, swelling, or limited elbow mobility. Persistent pain during or after exercises, numbness, or tingling in the arm or hand are red flags. If you notice significant weakness or instability in the elbow, consult a healthcare provider. Additionally, if symptoms worsen despite rest and rehabilitation, professional evaluation is crucial. Ignoring these signs can lead to further injury or prolonged recovery. A healthcare professional can assess the severity of the UCL injury and recommend appropriate treatment, whether nonoperative or surgical. Early intervention ensures the best outcomes for recovery and return to activity.

Case Studies and Success Stories

Real-life applications of UCL exercises have enabled athletes to return to sports successfully. Detailed success stories highlight the effectiveness of structured rehabilitation programs in achieving full recovery.

Real-Life Applications of UCL Exercises

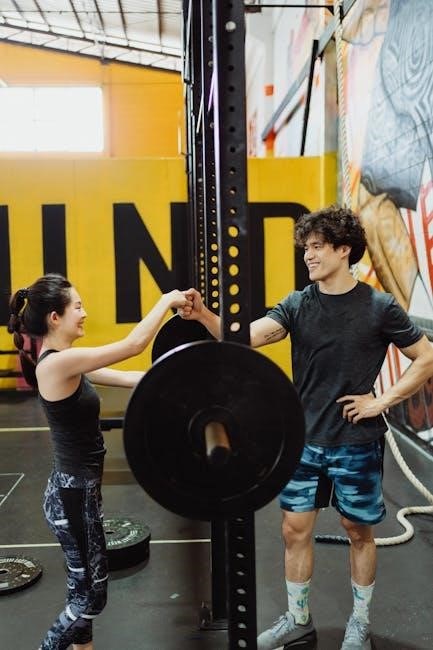
A competitive cheerleader with a UCL injury successfully returned to sports using a structured UCL Exercises PDF guide. The program included weight-bearing exercises, progressing in difficulty and duration, enabling her to resume advanced tumbling within three months. The guide’s visual instructions and clear progression criteria ensured adherence and optimal recovery. Similar success stories highlight how structured rehabilitation protocols, including strengthening and mobility exercises, have helped athletes regain full function and return to their sports. These real-life applications demonstrate the effectiveness of comprehensive exercise guides in facilitating successful UCL rehabilitation and preventing future injuries.

Conclusion

The UCL Exercises PDF serves as a vital tool for effective rehabilitation, offering structured routines and visual guidance to ensure a successful recovery and return to activity.

Final Thoughts on UCL Rehabilitation

Consistent practice and patience are key to successful UCL rehabilitation. A well-structured UCL Exercises PDF guide ensures a progressive and safe approach to recovery. Incorporating exercises like the Throwers Ten Program and plyometric drills can enhance strength and functionality. Monitoring progress and avoiding overloading are crucial to prevent setbacks. The guide’s visual instructions and detailed timelines help athletes and therapists stay aligned. While the PDF is an invaluable resource, it should complement professional guidance. By adhering to the outlined protocols, individuals can effectively restore elbow stability and return to their activities. Remember, rehabilitation is a journey requiring dedication and careful adherence to prescribed routines.

Encouragement for Consistent Practice

Consistency is the cornerstone of successful UCL rehabilitation. Staying committed to the exercises outlined in the UCL Exercises PDF ensures steady progress and minimizes the risk of setbacks. Celebrate small milestones, like increasing range of motion or strength, to stay motivated. The guide’s structured approach helps maintain discipline, even when progress feels slow. Remember, every repetition and session brings you closer to full recovery. Share your goals with a therapist or teammate for added accountability. By prioritizing regular practice, you’ll rebuild resilience and confidence, paving the way for a strong return to your activities. Keep pushing forward—consistent effort leads to lasting results.

Additional Resources

Explore Rehab to Throw Like a Pro for detailed UCL exercises and recovery strategies. Visit overheadathletics.com and rehabscience.com for expert guidance and downloadable resources.

Recommended Reading and Websites

For in-depth guidance, consider “Rehab to Throw Like a Pro: The Clinician’s Guide”, offering detailed UCL exercises and recovery strategies. Visit overheadathletics.com for expert protocols and rehabscience.com for newsletters and resources. These sources provide evidence-based approaches, ensuring safe and effective rehabilitation. They cater to both clinicians and athletes, promoting optimal recovery and performance. Utilize these resources to enhance your understanding and implementation of UCL rehabilitation techniques.

cuisinart rice cooker instruction manual

The Cuisinart Rice Cooker is a versatile and efficient kitchen appliance designed to simplify rice preparation. With its advanced features‚ it ensures perfect results every time‚ making it a must-have for home cooks seeking convenience and consistency.

1.1 Overview of the Cuisinart Rice Cooker

The Cuisinart Rice Cooker is a versatile and efficient kitchen appliance designed to simplify rice preparation. It offers advanced features like multiple cooking modes‚ delay start‚ and keep-warm functions. Suitable for various rice types‚ including white‚ brown‚ jasmine‚ and basmati‚ it ensures perfectly cooked results. Built with durable materials‚ it features a stainless steel exterior and a non-stick inner pot for easy cleaning. This cooker is ideal for both beginners and experienced cooks‚ providing consistent performance and convenience for everyday use.

1.2 Importance of Reading the Instruction Manual

Reading the Cuisinart Rice Cooker manual is essential for safe and effective use. It provides detailed guidance on operation‚ maintenance‚ and troubleshooting‚ ensuring optimal performance. Understanding the features and settings helps avoid mistakes‚ while safety precautions protect users from potential hazards. The manual also offers tips for extending the appliance’s lifespan and resolving common issues. By following the instructions‚ users can maximize their cooking experience and enjoy perfectly cooked rice every time.

Product Overview

Versatile‚ efficient‚ and designed for superior performance‚ the Cuisinart Rice Cooker offers a stainless steel construction‚ user-friendly interface‚ and advanced cooking options. Perfect for health-conscious home cooking.

2.1 Key Features of the Cuisinart Rice Cooker

The Cuisinart Rice Cooker boasts multiple cooking functions‚ including options for white and brown rice‚ quinoa‚ and yogurt. Its digital control panel offers preset settings for effortless cooking. The keep-warm function ensures rice stays fresh for hours‚ while the delay start timer allows meal planning. A stainless steel exterior and non-stick inner pot enhance durability and ease of cleaning. Additional features include a measuring cup and rice paddle for precise preparation. These features make it a versatile and user-friendly appliance for diverse culinary needs.

2.2 Design and Build Quality

The Cuisinart Rice Cooker boasts a sleek‚ modern design with durable materials like stainless steel and BPA-free plastics. Its sturdy build ensures long-lasting performance‚ while the compact footprint saves kitchen space. The intuitive control panel features clear buttons and an LCD display‚ making operation straightforward; The inner pot is non-stick‚ preventing rice from sticking and easing cleanup. Overall‚ the design prioritizes functionality and aesthetics‚ ensuring a seamless cooking experience for home cooks.

2.3 Available Models and Variants

Cuisinart offers a range of rice cooker models to suit different needs. The CRC-400 and CRC-800 are popular choices‚ with the latter featuring an 8-cup capacity. The CRC-10 and CRC-12 models include advanced settings like delay start and brown rice modes. Premium variants may include stainless steel construction or additional cooking functions; Each model is designed to provide versatility‚ ensuring users can choose the perfect fit for their kitchen and cooking preferences.

Technical Specifications

The Cuisinart Rice Cooker features varying capacities‚ from 4 to 8 cups‚ with 400-1000W power consumption. It operates at 120V‚ offering functions like delay start and keep warm for added convenience.

3.1 Capacity and Size Options

The Cuisinart Rice Cooker is available in various sizes‚ including 4‚ 6‚ 8‚ and 12-cup models‚ catering to different household needs. The compact design ensures it fits neatly on countertops‚ while the stainless steel inner pot offers durability and easy cleaning; Whether for small families or large gatherings‚ there’s a size to suit every requirement‚ providing versatility and convenience in rice preparation.

3.2 Power Consumption and Voltage Requirements

The Cuisinart Rice Cooker typically operates at 500-700 watts‚ depending on the model. It requires a standard household voltage of 120V AC for proper functioning. Always use a dedicated electrical outlet to avoid power overload. Ensure the voltage matches your region to prevent damage. Refer to the manual for specific power details‚ as requirements may vary slightly across models.

3.3 Additional Functions and Settings

The Cuisinart Rice Cooker offers a range of additional functions and settings to enhance your cooking experience. These include a delay start timer‚ allowing you to prepare meals in advance‚ and a keep-warm function to maintain the perfect temperature after cooking. Some models feature specialized settings for different types of rice‚ such as brown rice or sushi rice‚ ensuring optimal results. Additional settings may include steam options for cooking vegetables or seafood simultaneously‚ making it a versatile kitchen companion.

Setup and Installation

Unbox and inspect the cooker for damage. Place it on a stable‚ heat-resistant surface. Plug in the unit and ensure all parts are securely attached. Wash and clean before first use.

4.1 Unboxing and Initial Inspection

When unboxing your Cuisinart Rice Cooker‚ carefully inspect the contents to ensure all components are included and undamaged. Typically‚ the package includes the main unit‚ inner pot‚ lid‚ steam tray‚ and accessories like a rice paddle and measuring cup. Check for any visible damage or defects. Verify that all parts are clean and free from packaging debris. This step ensures a smooth setup process and helps identify any issues before first use.

4.2 Placement and Storage Guidelines

Place the Cuisinart Rice Cooker on a stable‚ flat surface away from direct heat sources and water. Ensure proper ventilation for optimal performance. Store the cooker in a cool‚ dry place when not in use‚ avoiding humidity. Keep the power cord neatly wrapped to prevent damage. Always store the cooker out of children’s reach. Clean the appliance thoroughly before storing it to maintain hygiene and functionality. Follow these guidelines to extend the lifespan and ensure safe operation of your Cuisinart Rice Cooker.

4.3 Initial Setup and Preparation

Before first use‚ ensure all components are properly assembled. Plug in the cooker and familiarize yourself with the control panel. Conduct a test run without ingredients to verify functionality. Ensure the inner pot is securely placed and the lid aligns correctly. Refer to the manual for specific setup instructions tailored to your model. This step ensures smooth operation and prevents potential issues during cooking.

4.4 Washing and Cleaning Before First Use

Before using your Cuisinart Rice Cooker for the first time‚ wash the inner pot‚ lid‚ and accessories with mild soap and warm water. Rinse thoroughly to remove any manufacturing residue. Dry all parts with a clean towel to prevent water spots. Avoid using abrasive cleaners or scourers‚ as they may damage the surfaces. Wipe the exterior with a damp cloth to remove any dust or packaging marks. This ensures your cooker is clean and ready for its first use.

4.5 Plugging In and Powering On

Before first use‚ ensure the rice cooker is placed on a stable‚ heat-resistant surface. Locate the power cord and plug it into a nearby grounded electrical outlet. Avoid using extension cords to maintain safety and performance. Press the power button‚ usually found on the control panel‚ to turn on the device. You should hear a gentle click or see the control panel lights illuminate‚ indicating the cooker is ready for operation. Always check that the outlet matches the voltage requirements specified in the manual.

Operating the Cuisinart Rice Cooker

Operating the Cuisinart Rice Cooker involves using the intuitive control panel to select cooking modes‚ add ingredients‚ and start the process. It ensures effortless and precise cooking.

5.1 Understanding the Control Panel

The control panel of the Cuisinart Rice Cooker is user-friendly‚ featuring buttons for Start/Stop‚ Delay Start‚ and Keep Warm functions. An LCD display shows cooking progress and settings; Key buttons include menu selection‚ timer adjustment‚ and a reset option. Indicators light up to signal cooking phases‚ ensuring clear operation. Refer to the manual for specific button functions and custom settings to optimize your cooking experience.

5.2 Cooking Modes and Settings

The Cuisinart Rice Cooker offers multiple cooking modes to cater to various needs. These include settings for white rice‚ brown rice‚ sushi rice‚ and grains like quinoa or oats. Additional features such as a keep-warm function and delay start allow for flexible meal preparation. The cooker also includes options for steaming vegetables or cooking soups‚ making it a versatile kitchen companion. These modes ensure perfect results and adapt to different recipes‚ providing convenience and customization for home cooks.

  • White Rice Mode
  • Brown Rice Mode
  • Sushi Rice Mode
  • Grain Mode
  • Keep Warm Function
  • Delay Start Option

5.3 Measuring and Adding Ingredients

Accurate measuring is key to perfect rice cooking. Use the provided measuring cup to scoop rice and water. Rinse rice thoroughly before adding. Place ingredients in the inner pot‚ ensuring rice is evenly spread. Add seasonings‚ salt‚ or oil if desired. Avoid overfilling beyond the max line. For precise water levels‚ align with the marked guidelines. Optional ingredients like herbs or spices can be added on top. Always mix gently before starting the cooker to ensure even distribution and flavor infusion.

5.4 Adding Water and Seasonings

Accurately measure water according to the rice quantity using the provided cup. Add water to the inner pot‚ ensuring the water level aligns with the markings. Seasonings like salt‚ herbs‚ or spices can be added directly to the water for flavor. For even distribution‚ place seasonings in the water before adding rice. Optional: Add a tablespoon of oil or broth for enhanced taste. Avoid over-seasoning initially‚ as flavors intensify during cooking. Adjust to taste after cooking completes.

5.5 Starting the Cooking Process

Once all ingredients are added‚ close the lid securely. Press the “Start” button on the control panel to begin cooking. The cooker will automatically initiate the selected mode. Ensure the lid remains closed during cooking to maintain heat and steam. The rice cooker will signal with a sound or light when the process is complete. Avoid opening the lid prematurely to allow even cooking and prevent steam from escaping.

5.6 Monitoring the Cooking Progress

Monitoring the cooking progress on your Cuisinart Rice Cooker is straightforward. The LED display shows the current cooking status‚ and the steam vent allows you to observe the cooking process. Avoid opening the lid frequently‚ as this can disrupt the even cooking of the rice. Instead‚ rely on the cooker’s indicators to track progress. Once the cycle completes‚ the cooker will automatically switch to the “Keep Warm” mode‚ ensuring your rice stays perfectly cooked and ready to serve.

Cleaning and Maintenance

Regular cleaning ensures optimal performance. Wipe the exterior with a damp cloth‚ and wash the inner pot and lid with mild soap. Descaling periodically prevents mineral buildup.

6.1 Cleaning the Exterior

To clean the exterior of your Cuisinart Rice Cooker‚ use a soft‚ damp cloth to wipe down the surfaces. Avoid harsh chemicals or abrasive cleaners‚ as they may damage the finish. For stubborn stains‚ mix a solution of equal parts water and white vinegar. Dampen a cloth with the solution and gently scrub the area. Rinse thoroughly with a clean‚ damp cloth and dry to prevent water spots. Never submerge the unit in water or use bleach‚ as this can harm the electrical components.

6.2 Cleaning the Inner Pot and Lid

Regularly clean the inner pot and lid to maintain hygiene and performance. Use mild soap and warm water‚ avoiding abrasive materials that could scratch surfaces. For stubborn stains‚ soak the pot in soapy water before scrubbing gently. Rinse thoroughly and dry with a soft cloth to prevent water spots. Avoid using metal utensils or harsh chemicals‚ as they may damage the non-stick coating. For tough food residue‚ mix baking soda and water to create a paste‚ apply it‚ and let it sit before cleaning. Regular deep cleaning ensures optimal functionality and prevents mineral buildup.

6.3 Regular Maintenance Tips

Regular maintenance ensures your Cuisinart Rice Cooker performs optimally. Clean the inner pot and lid after each use to prevent residue buildup. Avoid using abrasive cleaners or metal scourers‚ as they may damage the non-stick coating. Check the lid seal for tightness and replace it if worn. Descale the cooker periodically to remove mineral deposits. Store the appliance in a dry place to prevent mold growth. These simple steps will extend the lifespan and maintain the efficiency of your rice cooker.

6.4 Descaling the Rice Cooker

Descaling the Cuisinart Rice Cooker is essential to remove mineral buildup from water‚ which can affect performance. Mix equal parts water and white vinegar in the inner pot. Heat the solution on the “Keep Warm” or “Low” setting for 30 minutes to loosen deposits. Use a soft cloth to wipe down the interior and exterior surfaces. Rinse thoroughly with clean water to remove any vinegar residue. Regular descaling every 1-2 months ensures optimal functionality and longevity of the appliance.

Safety Precautions

Always handle hot surfaces with care‚ avoid electrical exposure‚ and keep children away. Ensure proper ventilation and follow manual guidelines to prevent accidents and ensure safe operation.

7.1 General Safety Guidelines

Always handle the Cuisinart Rice Cooker with care to avoid accidents. Keep it away from water and ensure the cord is not damaged. Place it on a stable‚ heat-resistant surface. Never leave the cooker unattended while in use. Avoid touching hot surfaces‚ such as the inner pot or lid‚ during operation. Keep children away from the appliance. Do not insert metal objects into the cooker‚ as this may cause electrical shock. Follow all instructions in the manual to ensure safe operation.

7.2 Handling Hot Surfaces

Always use oven mitts or tongs when handling the inner pot or lid‚ as they may be extremely hot during and after cooking. Keep children away from hot surfaces to prevent burns. Never touch the cooker’s heating elements or inner pot with bare hands. Allow the cooker to cool down before cleaning or storing. Burns can occur if proper precautions are not taken. Always prioritize caution when interacting with hot components to ensure safe operation.

7.3 Electrical Safety Tips

To ensure safe operation‚ always use the Cuisinart Rice Cooker with the original power cord and avoid overloading circuits. Keep the appliance away from water sources to prevent electrical hazards. Never submerge the cooker in water or expose it to excessive moisture. Avoid using damaged cords or plugs‚ as they can cause electrical shocks. Unplug the cooker when not in use or during cleaning. Always follow the manufacturer’s guidelines for voltage and power requirements to maintain electrical safety.

7.4 Child Safety Considerations

To ensure safe usage‚ keep children away from the rice cooker while it’s in operation. The exterior and handles can get hot‚ so use oven mitts or tongs for handling. Always place the cooker on a stable‚ heat-resistant surface out of children’s reach. Secure loose cords to prevent accidental tipping. Supervise children in the kitchen and teach them about the dangers of hot appliances. Store accessories and parts safely to avoid choking hazards or burns. Regularly inspect the cooker for damage to maintain safety standards.

Troubleshooting Common Issues

Identify and resolve issues like undercooked rice‚ overcooked grains‚ or malfunctioning controls by checking power supply‚ rice-to-water ratios‚ and ensuring the inner pot is clean and undamaged.

8.1 Common Problems and Solutions

Common issues with the Cuisinart Rice Cooker include rice sticking to the pot or undercooked grains. Solutions involve ensuring the correct water ratio‚ using a non-stick spray‚ and checking the lid seal. If the cooker doesn’t turn on‚ verify power connections and circuit functionality. For uneven cooking‚ stir rice midway. Cleaning regularly prevents residue buildup. Refer to the manual for troubleshooting guides to resolve these issues effectively and maintain optimal performance.

8.2 Error Codes and Their Meanings

The Cuisinart Rice Cooker may display error codes like E1‚ E2‚ or E3‚ indicating specific issues. E1 often relates to temperature sensor malfunctions‚ while E2 may signal a faulty heating element. E3 typically points to a problem with the lid sensor. Refer to the manual for detailed solutions‚ such as resetting the device or cleaning sensors. Addressing these codes promptly ensures optimal performance and prevents further complications.

Accessories and Additional Features

9.1 Included Accessories

The Cuisinart Rice Cooker comes with a measuring cup‚ spatula‚ and steam tray for versatile cooking. These accessories enhance functionality and convenience.

9.2 Optional Accessories

Optional accessories like additional inner pots and rice paddles can be purchased separately for added convenience and easier meal preparation.

9.3 Special Features (Keep Warm‚ Delay Start‚ etc.)

Features such as delay start‚ keep warm‚ and specialized settings for different grains ensure flexibility and perfect results for various cooking needs.

The Cuisinart Rice Cooker comes with essential accessories to enhance your cooking experience. These include a non-stick inner pot for easy rice preparation‚ a rice paddle for serving‚ and a measuring cup for precise water ratios. Additionally‚ a lid is provided to trap steam and flavors; These accessories are designed to work seamlessly with the cooker‚ ensuring optimal performance and convenience. They are durable‚ easy to clean‚ and complement the cooker’s functionality‚ making it a comprehensive solution for rice cooking needs.

Optional accessories for the Cuisinart Rice Cooker include a steamer basket‚ additional rice paddles‚ and measuring cups. These enhance functionality and versatility‚ allowing for healthier meals and easier preparation. A non-stick liner can also be purchased for effortless food release and cleaning. Additionally‚ recipe books or digital apps may be available to inspire creative cooking. These accessories can be found on the official Cuisinart website or authorized retailers‚ ensuring compatibility and quality.

The Cuisinart Rice Cooker boasts several special features that enhance convenience and flexibility. The Keep Warm function maintains optimal temperature after cooking‚ ensuring rice stays fresh. Delay Start allows users to set a timer‚ enabling rice to be ready when needed. Additional features include multiple cooking modes for different rice types‚ a steaming basket for vegetables or proteins‚ and an automatic shut-off for safety. These features make it a versatile and user-friendly appliance for various culinary needs.

Cooking Tips and Recipes

For perfect results‚ rinse rice before cooking. Use the recommended water ratio for fluffy grains. Sauté spices in the cooker for added flavor. Mix in herbs or vegetables during the last 10 minutes. Experiment with recipes like stir-fries or curries for variety.

10.1 Tips for Perfect Rice Cooking

For flawless rice‚ rinse grains thoroughly before cooking to remove excess starch. Use the provided measuring cup for precise water ratios. Select the appropriate setting for your rice type. Avoid opening the lid during cooking to ensure even steam distribution. Let the rice rest for 5 minutes after cooking to enhance texture. Experiment with seasonings or herbs for added flavor. Regularly clean the cooker to prevent residue buildup. These tips ensure optimal performance and delicious results every time.

10.2 Cooking Other Grains and Meals

The Cuisinart Rice Cooker is not limited to rice; it excels at preparing other grains like quinoa‚ oats‚ and barley. Experiment with diverse recipes by adjusting water ratios and adding seasonings. For example‚ try making hearty oatmeal or flavorful pilafs. The cooker’s versatility also extends to cooking legumes‚ stews‚ and even desserts like cinnamon-infused apples. Its precise temperature control ensures perfect results for a wide variety of dishes‚ making it a versatile addition to your kitchen.

10.3 Experimenting with New Recipes

The Cuisinart Rice Cooker is a versatile appliance that encourages creativity in the kitchen. Beyond traditional rice dishes‚ users can experiment with international recipes like paella‚ risotto‚ or even quinoa bowls. Incorporate proteins‚ vegetables‚ and spices to create flavorful meals. For inspiration‚ refer to the manual’s recipe section or explore online for unique ideas. Don’t hesitate to adjust seasonings and ingredients to suit your taste. Remember‚ the cooker’s settings can be tailored to ensure perfect results for any dish you invent!

Warranty and Customer Support

Cuisinart offers a limited warranty covering defects in materials and workmanship. Customer support is available via phone‚ email‚ or online resources for troubleshooting and assistance.

11.1 Warranty Coverage and Duration

The Cuisinart Rice Cooker is backed by a limited warranty that covers manufacturing defects in materials and workmanship. The standard warranty period is three years from the date of purchase. This warranty applies to the original purchaser and is non-transferable. It does not cover damage caused by misuse‚ accidents‚ or normal wear and tear. For detailed terms and conditions‚ refer to the official Cuisinart website or the warranty document provided with your purchase.

11.2 Registering Your Product

Registering your Cuisinart Rice Cooker is essential for warranty activation and customer support. Visit the official Cuisinart website‚ navigate to the product registration page‚ and fill in the required details‚ including your personal information and product serial number. This process ensures you receive updates‚ exclusive offers‚ and extended warranty benefits. Keep the registration confirmation for future reference to avoid any issues with warranty claims or support requests.

11.3 Contacting Customer Support

For any inquiries or issues‚ Cuisinart provides dedicated customer support. You can reach them via phone‚ email‚ or through their official website. Visit the Cuisinart website for contact details and support options. Ensure to have your product model number ready for efficient assistance. Their team is available to address questions‚ provide troubleshooting‚ or help with warranty claims. Reaching out to customer support is a great way to resolve concerns and maximize your rice cooker’s performance.

The Cuisinart Rice Cooker is a reliable and user-friendly appliance that simplifies rice cooking. Its advanced features‚ durability‚ and ease of use make it a valuable addition to any kitchen. By following the instruction manual‚ users can unlock its full potential‚ ensuring perfectly cooked meals every time. Whether you’re a novice or an experienced cook‚ this cooker offers versatility and convenience‚ making it a long-term investment for delicious and stress-free cooking experiences.

instructions braun thermoscan

Braun Thermoscan is a top choice for accurate and safe temperature measurement‚ offering fast and reliable readings․ It’s designed for household use‚ ensuring quick and hassle-free temperature checks․

1․1 Overview of Braun Thermoscan

Braun Thermoscan is a highly regarded infrared ear thermometer known for its accuracy and speed․ Designed for household use‚ it provides reliable temperature readings with minimal discomfort․ The device features a compact design‚ making it easy to handle and store․ It is particularly popular for its gentle and fast measurements‚ ideal for families with children․ Various models‚ such as the Thermoscan 3‚ 5‚ and 7‚ offer different features like memory recall and fever indicators․ The thermometer operates using infrared technology to measure body temperature through the ear canal․ Proper usage requires genuine Braun probe covers for hygiene and accuracy․ Regular cleaning with isopropyl or ethyl alcohol is recommended․ User manuals are available for detailed instructions‚ ensuring safe and effective use․ This device is a trusted choice for quick and reliable temperature monitoring at home․

1․2 Importance of Proper Usage

Proper usage of the Braun Thermoscan is essential for accurate and safe temperature measurements․ Using genuine Braun probe covers ensures hygiene and precision‚ while incorrect use may lead to inaccurate readings․ Always follow the manufacturer’s instructions to maintain the device’s effectiveness․ Cleaning the probe lens with isopropyl or ethyl alcohol‚ as specified‚ prevents contamination and ensures reliable results․ Improper cleaning agents can damage the thermometer․ Regular maintenance‚ such as replacing probe covers and storing the device correctly‚ extends its lifespan․ Proper technique‚ as outlined in the manual‚ minimizes discomfort and ensures accurate readings․ Consulting a physician for unusual symptoms is recommended․ Adhering to these guidelines ensures safe‚ effective‚ and reliable use of the Braun Thermoscan thermometer for household health monitoring․

Understanding the Components

The Braun Thermoscan includes a digital thermometer‚ probe lens‚ and LCD display․ The probe lens and covers ensure accurate measurements and hygiene‚ while the display shows readings clearly․

2․1 Key Parts of the Thermometer

The Braun Thermoscan thermometer consists of a digital display‚ the thermometer unit‚ and a detachable probe․ The digital display shows the temperature reading‚ while the thermometer unit houses the electronic components․ The probe‚ with its lens‚ is the sensing part that measures infrared radiation․ It also includes probe covers for hygiene and accuracy․ The device has an on-button to activate it and a memory recall button to view previous readings․ The LCD screen displays temperature‚ a fever indicator‚ and a low-battery signal․ Understanding these components ensures proper usage and maintenance of the thermometer for accurate and reliable temperature measurements․

2․2 Probe Lens and Probe Cover

The probe lens is the critical component of the Braun Thermoscan thermometer‚ detecting infrared radiation to measure temperature․ It must remain clean and free of damage to ensure accurate readings․ The probe cover is a disposable‚ transparent cap placed over the lens to maintain hygiene and prevent contamination․ Always use a new probe cover for each measurement to avoid cross-contamination and ensure precise results․ After use‚ discard the probe cover and store the thermometer with a protective cover to safeguard the lens․ Proper care of the probe lens and consistent use of probe covers are essential for maintaining the accuracy and longevity of the Braun Thermoscan thermometer․

Safety Precautions

Always handle the thermometer with care‚ avoiding contact with hot surfaces or sharp objects․ Keep it out of children’s reach and use only as directed to ensure safe and accurate temperature measurement․

3․1 General Safety Guidelines

Always handle the Braun Thermoscan with care to avoid damage․ Ensure the thermometer is used only for its intended purpose and by individuals trained in its operation․ Avoid exposing the device to extreme temperatures‚ moisture‚ or physical stress․ Keep the thermometer out of reach of children to prevent accidental misuse․ Regularly inspect the device for damage or wear and tear․ Never use the thermometer if it is damaged or shows signs of malfunction․ Follow the user manual instructions strictly to ensure safe and accurate measurements․ Proper hygiene practices should be maintained when handling the device․ Store the thermometer in a dry‚ clean environment when not in use․

3․2 Handling the Thermometer

Always handle the Braun Thermoscan thermometer gently to prevent damage․ Ensure the probe is inserted correctly into the ear canal‚ following the manufacturer’s instructions․ Avoid touching the probe tip‚ as this can affect accuracy․ Use a new probe cover for each measurement to maintain hygiene․ After use‚ carefully remove the probe cover and dispose of it properly․ Regularly clean the thermometer’s exterior with a soft cloth and mild detergent‚ avoiding harsh chemicals․ Store the device in its provided case to protect it from damage․ Never submerge the thermometer in water or expose it to extreme temperatures․ Proper handling ensures accurate readings and extends the device’s lifespan․

Setting Up the Thermometer

Unpack the Braun Thermoscan thermometer and ensure all components are included․ Insert the batteries correctly‚ matching the positive and negative signs․ Power on the device to verify it’s operational․ Adjust settings like temperature units if necessary․ Follow any additional setup instructions provided for optimal functionality․

4․1 Unpacking and Initial Setup

Begin by carefully unpacking the Braun Thermoscan thermometer from its packaging․ Ensure all components‚ such as the thermometer‚ lens filters‚ storage case‚ and instruction manual‚ are included․ Inspect the device for any visible damage or defects․ Before first use‚ read the manual thoroughly to understand the product’s features and operation․ Remove any protective coverings from the thermometer and lens․ Insert the provided lens filter into the probe tip‚ ensuring it is securely attached․ Finally‚ check if the device requires batteries and install them as directed․ Properly completing these steps ensures the thermometer is ready for accurate and safe operation․ Always follow the manufacturer’s guidelines for initial setup․

4․2 Powering On the Device

To power on the Braun Thermoscan thermometer‚ locate the power button‚ typically found on the front of the device․ Press and hold this button until the display lights up and the start-up tone sounds․ Ensure the batteries are correctly installed‚ as the device requires power to function․ Refer to the manual for battery type and installation instructions․ If the device does not turn on‚ check for loose battery connections or expired batteries․ Once powered on‚ the thermometer will perform a self-test‚ indicated by a brief flashing of the display․ After the self-test completes‚ the device is ready for use․ Always follow the manufacturer’s guidelines for powering on and preparing the thermometer for measurement․

Measuring Temperature

Ensure the probe is clean and use a new probe cover each time․ Gently insert the thermometer into the ear canal‚ holding it steady․ Wait for the beep to confirm the reading is complete․ The display will show the temperature․ Always follow the manufacturer’s instructions for accurate results․

5․1 Before Measurement

Before measuring‚ ensure the thermometer is clean and ready for use․ Replace the probe cover with a new one for hygiene․ Choose a quiet environment to avoid distractions․ Gently prepare the child by explaining the process․ Position the child upright or sideways‚ ensuring the ear canal is accessible․ Remove any earwax visibly blocking the canal․ Turn on the device and allow it to initialize․ Ensure the probe lens is clean and free of debris․ Always use a new probe cover for each measurement to maintain accuracy and hygiene․ Proper preparation ensures quick and accurate readings‚ making the process smoother for both the user and the child․

5․2 During Measurement

During measurement‚ gently pull the ear back to straighten the ear canal‚ ensuring accurate reading․ Hold the thermometer steady‚ avoiding movement‚ and align the probe with the ear canal․ Keep the device firm but gentle to prevent discomfort․ The thermometer emits a soft beep when ready; Once in position‚ press the scan button and hold until it beeps again․ This indicates the measurement is complete․ Do not move the device during scanning․ The result will display on the screen․ Ensure the probe remains in the ear until the beep signals completion․ Refer to the device’s beeps or lights to confirm the process is done․ Proper alignment and steadiness are key for accurate results․

5․3 After Measurement

After measurement‚ carefully remove the probe from the ear to avoid discomfort․ Turn off the device to conserve battery life․ Clean the probe lens with a soft cloth or alcohol wipe to maintain hygiene․ Replace the probe cover to prevent contamination․ Store the thermometer in its protective case to avoid damage․ Record the temperature reading for future reference‚ especially for tracking progress in illness․ Ensure the device is kept out of reach of children․ If unsure about the reading‚ refer to the user manual or retake the measurement․ Proper post-measurement care ensures accuracy and longevity of the Braun Thermoscan․ Always follow cleaning and storage guidelines provided by the manufacturer for optimal performance․

Maintaining the Thermometer

Regular cleaning with a soft cloth and storing in a protective case ensures optimal performance and extends the lifespan of your Braun Thermoscan for reliable temperature readings․

6․1 Cleaning the Device

Cleaning your Braun Thermoscan is essential for maintaining accuracy and hygiene․ Use a soft‚ dry cloth to wipe the exterior gently․ For tougher spots‚ dampen the cloth with mild soap solution‚ but avoid harsh chemicals or submerging the device in water․ The probe lens should be cleaned with an alcohol swab‚ ensuring no moisture enters the thermometer․ Regular cleaning prevents bacterial buildup and ensures reliable readings․ Always dry the device thoroughly before storage or reuse․ Cleaning after each use is recommended‚ especially when sharing the thermometer among family members․ This practice extends the device’s lifespan and maintains its precision for consistent temperature measurements․

6․2 Storing the Thermometer

Proper storage of your Braun Thermoscan ensures its longevity and accuracy․ Store the thermometer in a cool‚ dry place‚ away from direct sunlight and moisture․ Use the protective case provided to prevent damage or scratches․ Avoid exposing the device to extreme temperatures or humidity‚ as this may affect its performance․ Keep the probe lens clean and dry before storing to maintain Hygiene․ Do not store the thermometer near chemicals or cleaning agents․ Always ensure the device is turned off before storing it․ Regularly inspect the storage case for damage or wear․ For detailed storage guidelines‚ refer to the user manual․ Proper storage helps preserve the thermometer’s precision and ensures reliable temperature readings when needed․

6․3 Replacing Probe Covers

To maintain hygiene and accuracy‚ replace the probe cover after each use․ Remove the old cover by gently pulling it away from the thermometer․ Dispose of used covers in a hygienic manner․ Take a new probe cover from the packaging and ensure it is compatible with your Braun Thermoscan model․ Align the new cover with the probe lens‚ ensuring it snaps securely into place․ Avoid touching the probe lens to prevent contamination․ Regularly replacing probe covers helps maintain accurate temperature readings and prevents the spread of germs․ Always use original Braun replacement covers for optimal performance․ Store extra covers in a clean‚ dry place to ensure they remain sterile for future use․

Troubleshooting Common Issues

Common issues with Braun Thermoscan include inaccurate readings or device malfunction․ Check battery connections‚ ensure the probe is clean‚ and refer to the user manual for error codes․ Restarting the device often resolves many problems․

7․1 Understanding Error Messages

Understanding error messages on Braun Thermoscan is crucial for effective troubleshooting․ Common error codes like “E1” or “E2” indicate specific issues‚ such as a faulty probe or lens damage․ Always refer to the user manual for a detailed list of error codes and their meanings․ If an error appears‚ power off the device‚ wait a few seconds‚ and restart it․ For persistent issues‚ ensure the probe cover is clean and securely attached․ Low battery levels can also trigger errors‚ so replace batteries if necessary․ If problems persist‚ contact Braun customer support for further assistance․ Error messages are designed to guide you toward resolving the issue efficiently․

7․2 Solutions to Common Problems

For common issues with Braun Thermoscan‚ start by ensuring the probe lens is clean and free of debris․ Replace the probe cover if damaged or worn․ If the thermometer shows inconsistent readings‚ check for proper positioning and ensure the probe is securely attached․ Low battery levels can cause inaccurate results‚ so replace batteries promptly․ If the device fails to turn on‚ verify battery installation and try resetting by removing and reinserting the batteries․ For persistent errors‚ consult the user manual or contact Braun customer support․ Regular cleaning and proper storage can prevent many issues․ Always use genuine Braun accessories to maintain accuracy and functionality․

Additional Features

Braun Thermoscan includes advanced features like memory recall for tracking previous readings and a fever indicator for quick detection of elevated temperatures‚ enhancing user convenience and accuracy․

8․1 Memory Recall Function

The Braun Thermoscan features a memory recall function‚ allowing users to store and retrieve previous temperature readings․ This function is particularly useful for monitoring temperature trends over time‚ especially when tracking a patient’s recovery or managing recurring health conditions․ Most models can store up to 8-9 previous measurements‚ providing a quick reference for comparison․ To access the memory‚ users typically press and hold the dedicated memory button‚ which cycles through the stored readings․ This feature enhances convenience for both home users and healthcare professionals‚ ensuring accurate and consistent temperature monitoring without the need for manual record-keeping․ The memory function is a practical addition that streamlines the process of tracking health data effectively․

8․2 Fever Indicator

The Braun Thermoscan includes a convenient fever indicator feature‚ designed to provide quick and clear feedback during temperature measurement․ This feature uses visual or auditory signals to alert users when a fever is detected․ For example‚ some models display a fever icon or emit a distinct beep when the temperature exceeds a predetermined threshold․ This function is especially useful for parents or caregivers monitoring sick individuals‚ as it simplifies the interpretation of readings․ The fever indicator enhances the overall efficiency of the device‚ ensuring that users can immediately identify when medical attention may be necessary․ This feature is a valuable tool for prompt and accurate health monitoring‚ making it easier to respond to potential health concerns․

Choosing the Right Model

Selecting the right Braun Thermoscan model depends on your specific needs‚ such as accuracy requirements‚ ease of use‚ and additional features like multiple probes or memory functions․

9․1 Different Braun Thermoscan Models

Braun offers a range of Thermoscan models‚ each designed for specific needs․ The Thermoscan 3 is a basic‚ affordable option for quick readings․ The Thermoscan 5 includes additional features like a memory recall function and a fever indicator․ The Thermoscan 7 is the most advanced‚ offering wireless connectivity‚ multiple probe options‚ and enhanced accuracy․ Each model varies in features such as probe covers‚ display types‚ and age suitability․ Understanding the differences helps users choose the best fit for their household needs‚ ensuring accurate and reliable temperature measurement․ Always consider factors like ease of use‚ additional features‚ and compatibility with optional accessories when selecting a model․

9․2 Selecting Based on Needs

Selecting the right Braun Thermoscan model depends on individual preferences and requirements․ For families with young children‚ models with faster measurement times and soft probe tips are ideal․ Users needing advanced features like wireless connectivity or multiple probes should opt for higher-end models․ Consider the number of users‚ as some models are designed for single or multiple-person use․ Additionally‚ think about the age of the person being measured‚ as certain models are optimized for infants‚ children‚ or adults․ Assessing these factors ensures the chosen thermometer meets specific needs‚ enhancing accuracy and user satisfaction․ Always review the features and compatibility before making a final decision․

Comparing Braun Thermoscan Models

This section explores the differences between Braun Thermoscan models‚ focusing on features‚ accuracy‚ and user-friendliness to help users make informed decisions based on their specific needs․

10․1 Thermoscan 3 vs․ Thermoscan 5

The Braun Thermoscan 3 and Thermoscan 5 are popular models‚ but they differ in features and functionality․ The Thermoscan 5 includes a fever indicator‚ which provides visual confirmation of elevated temperatures‚ while the Thermoscan 3 lacks this feature․ Additionally‚ the Thermoscan 5 has a night light for easier use in low-light conditions‚ which is absent in the Thermoscan 3․ Both models use the same accurate sensor technology but vary in user convenience․ The Thermoscan 5 also offers faster measurement times‚ making it more efficient for busy households․ For users prioritizing advanced features‚ the Thermoscan 5 is the better choice‚ while the Thermoscan 3 remains a reliable option for basic use․

10․2 Thermoscan 5 vs․ Thermoscan 7

The Braun Thermoscan 5 and Thermoscan 7 differ in advanced features and functionality․ The Thermoscan 7 includes a more comprehensive fever indicator with multiple light levels for better clarity‚ while the Thermoscan 5 has a simpler single-light system․ Additionally‚ the Thermoscan 7 features improved measurement speed and accuracy due to its advanced infrared technology․ It also includes a larger memory storage capacity‚ allowing users to recall up to 9 previous readings‚ compared to the Thermoscan 5’s 5 readings․ The Thermoscan 7 often comes with more probe covers and a more ergonomic design‚ enhancing user comfort and hygiene․ For users seeking the latest technology and enhanced convenience‚ the Thermoscan 7 is the superior option․

Frequently Asked Questions

Common questions include ensuring accurate measurements‚ proper probe cover usage‚ and understanding error codes․ These topics are covered in the user manual for easy reference․

  • How do I ensure accurate temperature readings?
  • Can I use the thermometer without the probe cover?
  • What do the error codes mean?

11․1 Common Queries

Users often inquire about the accuracy of readings‚ proper probe cover usage‚ and interpreting error codes․ Additional questions include the thermometer’s suitability for different age groups and troubleshooting connectivity issues․ Many ask about the memory recall function and how to ensure hygienic storage․ Others seek clarity on the fever indicator’s functionality and the importance of calibration․ Some wonder about compatibility with other Braun accessories and the lifespan of the probe covers․ These queries highlight the need for clear guidelines to optimize the device’s performance and address user concerns effectively․ Proper usage and maintenance are key themes in these frequently asked questions․

11․2 Manufacturer’s Support

Braun Thermoscan users can rely on comprehensive support from the manufacturer․ The company offers detailed user manuals‚ online resources‚ and a dedicated customer service team․ For inquiries or issues‚ users can contact Braun’s support via phone‚ email‚ or through their official website․ Additionally‚ the manufacturer provides troubleshooting guides and FAQs on their website to address common concerns․ Braun also ensures regular software updates and maintenance tips to keep the device functioning optimally․ Customers can access replacement parts‚ such as probe covers‚ directly from Braun or authorized retailers․ This robust support system ensures users can resolve issues quickly and efficiently‚ maintaining their trust in the product’s reliability and performance over time․

Mastering the Braun Thermoscan ensures accurate and safe temperature measurement․ Regular maintenance and proper usage enhance its longevity․ Braun’s support guarantees reliable performance for years to come․

12․1 Summary of Key Points

Properly using the Braun Thermoscan requires understanding its components‚ following safety guidelines‚ and adhering to setup and measurement procedures․ Regular maintenance ensures accuracy and longevity of the device․ Troubleshooting common issues and utilizing additional features like memory recall and fever indicators enhance user experience․ Selecting the right model based on specific needs is essential for optimal performance․ By following the instructions and guidelines outlined‚ users can ensure accurate temperature readings and extend the lifespan of their Braun Thermoscan thermometer․ Always refer to the user manual for detailed instructions and contact customer support for further assistance․ Proper care and usage guarantee reliable results for years․

12․2 Final Tips for Effective Use

For optimal performance‚ always store the Braun Thermoscan in a dry‚ cool place to maintain accuracy․ Regularly clean the device using a soft cloth and avoid harsh chemicals․ Ensure the probe lens is free from dirt or moisture for precise readings․ Replace probe covers after each use to prevent cross-contamination․ Keep extra lens filters handy to avoid delays․ Battery maintenance is crucial; replace them when the low-battery indicator appears․ Avoid exposing the thermometer to extreme temperatures or direct sunlight․ Always refer to the user manual for specific care instructions․ By following these tips‚ you can ensure your Braun Thermoscan remains reliable and provides accurate temperature readings for years to come․

Resources for Further Assistance

Visit the official Braun website for detailed user manuals‚ troubleshooting guides‚ and FAQs․ Contact Braun customer support for personalized assistance and technical inquiries․

13․1 User Manuals

The Braun Thermoscan user manual provides comprehensive instructions for operating and maintaining the thermometer․ It includes detailed diagrams‚ step-by-step guidance‚ and troubleshooting tips․ The manual covers essential topics such as unpacking‚ powering on‚ measuring temperature‚ and interpreting results․ Additionally‚ it outlines safety precautions and maintenance routines to ensure accurate readings․ Digital versions of the manual are available on Braun’s official website‚ allowing easy access for reference․ Users are encouraged to review the manual thoroughly to understand all features and settings․ This resource is indispensable for first-time users and those seeking to optimize their device’s performance․ Always refer to the manual for specific model instructions and compliance with safety standards․

13․2 Customer Support Contact

Braun Thermoscan users can access dedicated customer support for assistance with their devices․ For inquiries‚ troubleshooting‚ or replacement parts‚ contact Braun’s customer service team via phone‚ email‚ or live chat through their official website․ The support team is available to address concerns‚ provide repair options‚ and clarify usage instructions․ Additionally‚ regional offices and authorized service centers can be contacted for localized support․ Visit Braun’s official website to find contact details tailored to your location․ This ensures prompt resolution of any issues related to your Braun Thermoscan thermometer‚ helping you maintain accurate and reliable temperature measurements․ Reach out for professional guidance whenever needed․

mgm grand map pdf

The MGM Grand Map PDF serves as a comprehensive guide, helping visitors navigate the vast property. It highlights key locations like the Grand Garden Arena, North Tower Rooms (1101-3120), South Tower Rooms (1301-3320), and essential services such as the FedEx Office. The map also details entertainment venues, dining options, and connectivity points like the Walkway to The Signature and Monorail Station, ensuring seamless exploration of the resort and its surroundings.

1.1 Overview of the MGM Grand Property

The MGM Grand property is a sprawling resort located on the Las Vegas Strip, offering a wide range of amenities and attractions. It features two main towers, the North Tower and South Tower, with rooms numbered 1101-3120 and 1301-3320, respectively. The property also includes the luxurious Skylofts and the convenient West Wing Elevators. Visitors can explore various entertainment venues like the Grand Garden Arena and the Underground Theater, while the casino floor provides extensive gaming options. Dining options range from fine dining to casual eateries, with lounges and bars adding to the vibrant atmosphere. The resort is well-connected, with a Walkway to The Signature, the New York-New York Bridge, and the Tropicana Bridge, ensuring easy access to nearby attractions.

1.2 Importance of a Map for Navigation

Navigating the expansive MGM Grand property can be challenging due to its size and numerous amenities. A map is essential for identifying key locations, such as the Grand Garden Arena, Underground Theater, and ticketing services. It helps visitors locate their rooms in the North Tower (1101-3120) or South Tower (1301-3320) efficiently. The map also highlights important services like the FedEx Office, Monorail Station, and parking areas. With clear markings for walkways, bridges, and elevators, it simplifies moving around the property. Additionally, the map aids in discovering dining options, lounges, and entertainment venues, ensuring visitors make the most of their stay. Its comprehensive layout reduces confusion and enhances the overall experience.

Accommodation at MGM Grand

MGM Grand offers a variety of accommodations, including North Tower Rooms (1101-3120), South Tower Rooms (1301-3320), and luxurious Skylofts, ensuring comfort and convenience for all guests.

2.1 North Tower Rooms (1101-3120)

The North Tower Rooms at MGM Grand, numbered from 1101 to 3120, offer comfortable and stylish accommodations. Located in the North Tower, these rooms provide easy access to key amenities such as the Grand Garden Arena and the Monorail Station. Guests can also enjoy proximity to the Walkway to The Signature and the FedEx Office for business needs. The rooms are designed to cater to both leisure and business travelers, featuring modern amenities and comfortable furnishings. With their central location, North Tower Rooms are ideal for exploring the resort and its surroundings, including nearby attractions like the T-Mobile Arena and the Las Vegas Strip.

2.2 South Tower Rooms (1301-3320)

The South Tower Rooms at MGM Grand, spanning from 1301 to 3320, offer a blend of comfort and convenience. Located in the South Tower, these rooms are strategically positioned near key facilities such as the Underground Theater and the T-Mobile Arena. Guests can easily access the Walkway to The Signature and the FedEx Office, making it ideal for both leisure and business stays. The rooms are equipped with modern amenities and provide a relaxing environment after a day of exploring the resort. Their proximity to attractions like the New York-New York Bridge and the Tropicana Bridge enhances the convenience for visitors looking to experience the vibrant Las Vegas Strip.

2.3 Skylofts at MGM Grand

The Skylofts at MGM Grand represent the pinnacle of luxury accommodations; These exclusive, boutique-style suites are situated atop the MGM Grand, offering breathtaking views of the Las Vegas skyline. Designed for discerning travelers, the Skylofts feature lavish interiors, private check-in, and personalized butler services. Guests can enjoy access to a private lounge and exclusive amenities, making their stay truly unforgettable. The Skylofts are perfect for those seeking a unique and secluded experience while still being close to the vibrant entertainment options and world-class dining available at MGM Grand. Their location ensures privacy and convenience, making them a top choice for high-end travelers.

2.4 West Wing Elevators

The West Wing Elevators at MGM Grand are strategically located to provide convenient access to the West Wing accommodations and surrounding amenities. These elevators are positioned near key attractions, ensuring guests can easily navigate to their rooms, the casino, dining options, and entertainment venues. Their proximity to parking and drop-off points makes them a hub for seamless transitions. The West Wing Elevators are designed for efficiency, offering quick access to upper floors and connecting guests to major highlights like the Grand Garden Arena and Monorail Station. Their central location ensures that visitors can effortlessly explore the resort, making them a vital part of the MGM Grand experience.

Casino and Gaming

The MGM Grand Casino features an extensive gaming floor with diverse options, including slots, table games, and poker. The layout is designed to enhance the gaming experience, offering a vibrant atmosphere and access to various gaming facilities, ensuring an exciting destination for both casual players and high rollers.

3.1 Layout of the Casino Floor

The casino floor at MGM Grand is meticulously designed to provide an optimal gaming experience. The layout is divided into distinct sections, each catering to different preferences and gaming styles. Slot machines are strategically placed throughout the floor, offering a wide variety of themes and denominations. Table games, including blackjack, roulette, and craps, are arranged in a spacious manner, ensuring comfortable access for players. High-limit gaming areas are secluded for those seeking privacy and exclusivity. The floor also features multiple bars and entertainment hubs, creating a lively atmosphere. Clear signage and pathways guide visitors seamlessly across the vast space, making it easy to explore all gaming options available.

3.2 Gaming Options and Facilities

MGM Grand offers an extensive array of gaming options, catering to both casual players and high rollers. The casino features over 2,500 slot machines, including progressive jackpots and the latest themes. Table games such as blackjack, roulette, and baccarat are plentiful, with various betting limits to suit all players. The poker room is a hotspot for enthusiasts, offering daily tournaments and cash games. Additionally, the high-limit gaming area provides an exclusive environment for those seeking higher stakes.

The casino also boasts state-of-the-art facilities, including luxurious lounges, bars, and dining options. Guests can enjoy convenient access to ATMs, currency exchange, and assistance from friendly staff. The atmosphere is vibrant, with live entertainment adding to the excitement. Whether you’re a seasoned gambler or a first-time visitor, MGM Grand’s gaming facilities ensure an unforgettable experience.

Entertainment Venues

MGM Grand features iconic entertainment venues, including the Grand Garden Arena, Underground Theater, and T-Mobile Arena, hosting world-class concerts, sports, and productions, ensuring unforgettable experiences for all visitors.

4.1 Grand Garden Arena

The Grand Garden Arena is a premier entertainment venue at MGM Grand, hosting world-class concerts, boxing matches, and events. With a seating capacity of over 17,000, it offers an intimate yet expansive setting for spectators. The arena is renowned for its state-of-the-art sound and lighting systems, ensuring an immersive experience. It has been the stage for legendary performers like Celine Dion and major sporting events like UFC fights. The MGM Grand map PDF highlights the arena’s location, making it easy for guests to navigate to and from the venue. Additionally, the map provides details on nearby facilities, ensuring a seamless visit for attendees.

4.2 Underground Theater

The Underground Theater at MGM Grand is an intimate venue designed for live performances, comedy acts, and exclusive events. With a smaller seating capacity, it offers a unique, up-close experience for audiences. The theater is equipped with cutting-edge technology to ensure high-quality sound and visuals. It’s a popular spot for stand-up comedy shows and emerging artists. The MGM Grand map PDF provides clear directions to the theater’s location, ensuring guests can easily find their way. The venue’s proximity to the casino floor makes it a convenient option for those looking to enjoy entertainment without venturing far. It’s a hidden gem within the resort, offering unforgettable experiences.

4.3 T-Mobile Arena

T-Mobile Arena is a state-of-the-art entertainment venue located near MGM Grand. While not directly inside the resort, it’s easily accessible via the pedestrian bridge connecting MGM Grand to the arena. The MGM Grand map PDF highlights this bridge, making navigation straightforward for guests. The arena hosts major events like concerts, sports, and mixed martial arts. Its proximity to MGM Grand makes it a prime location for visitors staying at the resort. The map ensures guests can plan their route efficiently, whether walking or using alternative transportation. This connectivity enhances the overall experience, allowing seamless access to world-class entertainment.

Dining and Restaurants

MGM Grand offers diverse dining options, from fine dining to casual eateries. The map PDF guides guests to restaurants, ensuring easy navigation through the resort’s extensive culinary offerings.

5.1 Fine Dining Options

MGM Grand boasts an exceptional selection of fine dining restaurants, offering culinary experiences crafted by world-renowned chefs. The map PDF highlights locations like Joël Robuchon, the Michelin-starred French restaurant, and L’Atelier de Joël Robuchon, where guests can enjoy a unique counter-seating experience. Other upscale options include Wolfgang Puck’s Spago, serving innovative Californian cuisine, and Michael Mina’s Stripsteak, known for premium cuts and seafood. These fine dining venues are strategically placed throughout the property, ensuring easy access for guests. The map provides clear directions, making it simple to navigate to these culinary gems. Whether celebrating a special occasion or indulging in a luxurious meal, MGM Grand’s fine dining options cater to every refined palate.

5.2 Casual Dining and Fast Food

MGM Grand offers a variety of casual dining and fast food options, ensuring quick and delicious meals for guests. The map PDF highlights convenient locations such as the Grand Food Court, featuring diverse eateries like Subway, McDonald’s, and international cuisine options. Casual dining spots like the MGM Grand Buffet provide an array of dishes for all-day dining. Fast food outlets are strategically placed near high-traffic areas, making it easy for guests to grab a bite on the go. The map helps visitors navigate to these spots effortlessly, ensuring they can enjoy a meal without missing out on the resort’s vibrant atmosphere. This section caters to those seeking affordable and speedy dining solutions.

5.3 Lounges and Bars

MGM Grand features an impressive selection of lounges and bars, perfect for unwinding or socializing. The map PDF guides visitors to popular spots like Hakkasan Bar, known for its vibrant atmosphere and craft cocktails. Whiskey Down offers an intimate setting with an extensive whiskey list. The Pool Bar provides refreshing drinks by the water, while the Lobby Bar is ideal for casual meetups. Sports fans can enjoy the TAP Sports Bar, featuring live games and pub-style fare. Each venue offers a unique experience, catering to diverse tastes. The map ensures guests can easily locate these spots, enhancing their overall stay and entertainment options at MGM Grand. These lounges and bars are integral to the resort’s lively vibe and guest satisfaction.

Services and Amenities

MGM Grand offers a variety of services and amenities to enhance guest experiences, including concierge services, ATMs, currency exchange, and wellness facilities like spas and fitness centers.

6.1 FedEx Office and Business Services

The FedEx Office at MGM Grand provides convenient business services for guests, including printing, shipping, and office supplies. Located near the convention center, it offers 24/7 access to essential tools like computers, fax machines, and photocopying. The office is fully equipped to handle last-minute printing needs for presentations or documents. Guests can also ship packages worldwide, ensuring business needs are met seamlessly during their stay. The MGM Grand map PDF highlights the exact location of the FedEx Office, making it easy for visitors to find and utilize these services without delay. This amenity is particularly useful for business travelers or those needing professional support during their visit.

6.2 Ticketing and Box Office Information

The MGM Grand offers a convenient Box Office for guests to purchase tickets to various shows, events, and attractions. Located near the casino entrance, the Box Office operates daily, typically from 10:00 AM onwards. The MGM Grand map PDF provides clear directions to this facility, ensuring easy access. Guests can buy tickets for resident shows, concerts, and special events without the need for third-party vendors. The Box Office also assists with ticket inquiries, cancellations, or reprints, making it a one-stop solution for entertainment planning. Utilizing the map helps guests navigate directly to the Box Office, saving time and enhancing their overall experience at the resort.

6.3 Monorail Station at MGM Grand

The MGM Grand Monorail Station is a convenient transportation hub located near the casino area. The MGM Grand map PDF highlights its exact location, making it easy for guests to find. The monorail connects MGM Grand to other major resorts on the Las Vegas Strip, such as Bellagio, Mirage, and Sahara. Operating from early morning to midnight, the monorail offers a quick and affordable way to explore nearby attractions. The map PDF includes markers for the station, ensuring guests can navigate directly to it. This service is especially useful for those attending events or visiting other hotels, making it a key feature of the resort’s connectivity.

Nearby Attractions and Connectivity

The MGM Grand map PDF showcases nearby attractions and connectivity options, ensuring easy access to Las Vegas landmarks and entertainment hubs for seamless exploration and convenience.

7.1 Walkway to The Signature

The MGM Grand map PDF highlights a convenient walkway connecting the resort to The Signature at MGM Grand, offering guests direct access to luxury all-suite accommodations. This enclosed walkway ensures a seamless transition between properties, allowing visitors to explore The Signature’s upscale amenities, including private pools and elite services. The proximity enhances the overall stay, providing guests with more dining, entertainment, and relaxation options. The walkway is strategically located, making it easy to navigate without venturing outdoors. This connectivity underscores MGM Grand’s commitment to providing a comprehensive and integrated resort experience, ensuring comfort and convenience for all visitors. The map guides users to this pathway, simplifying exploration.

7.2 New York-New York Hotel and Bridge

The MGM Grand map PDF features a direct pedestrian bridge connecting to the New York-New York Hotel, enhancing convenience for guests. This bridge offers easy access to both properties, allowing visitors to explore dining, entertainment, and shopping options seamlessly. Its strategic location ensures a smooth transition between resorts, with no need for transportation. The bridge’s design prioritizes comfort and accessibility, making it easy for guests to navigate. This connectivity between MGM Grand and New York-New York enriches the overall experience, providing endless opportunities for exploration and enjoyment. The map guides visitors to this bridge, ensuring they can fully utilize the amenities of both properties during their stay.

7.3 Tropicana Bridge

The MGM Grand map PDF highlights the Tropicana Bridge, a convenient pedestrian bridge connecting MGM Grand to the Tropicana Las Vegas. This bridge provides easy access between the two properties, offering guests a seamless way to explore additional dining, entertainment, and shopping options. Its prime location ensures a quick and hassle-free experience for visitors. The bridge is well-marked on the map, making it easy for guests to navigate. This connectivity enhances the overall stay experience, allowing guests to enjoy the amenities of both resorts without the need for transportation. The Tropicana Bridge is a practical feature that adds value to the MGM Grand map PDF, ensuring a smooth and enjoyable experience for all visitors.

Special Features of the MGM Grand

The MGM Grand boasts iconic landmarks, exclusive amenities, and unique attractions, making it a standout destination with unforgettable experiences for all visitors.

8.1 MGM Grand Tower Elevators

The MGM Grand Tower Elevators are a key feature, providing quick and efficient access to all floors. Strategically located throughout the property, these elevators ensure seamless navigation for guests. With modern technology and sleek designs, they enhance the overall experience. The elevators are clearly marked on the MGM Grand map PDF, helping visitors plan their movements. Whether heading to a room, restaurant, or entertainment venue, the elevators streamline travel. Their prominence in the map highlights their importance for easy accessibility across the sprawling resort. This feature is indispensable for guests, ensuring they make the most of their stay without unnecessary delays.

8.2 Convention and Event Spaces

The MGM Grand boasts extensive convention and event spaces, making it a premier destination for meetings, conferences, and gatherings. The MGM Grand Convention Center is prominently featured on the map PDF, offering over 500,000 square feet of flexible space. With state-of-the-art amenities, the venue accommodates events of all sizes, from intimate workshops to large-scale exhibitions. The map highlights key access points, ensuring easy navigation for attendees. Additionally, the resort’s event spaces are strategically located near hotels, dining, and entertainment options, enhancing convenience for participants. This makes MGM Grand an ideal choice for organizers seeking a seamless and impressive event experience.

Accessibility and Directions

The MGM Grand map PDF provides clear directions to key locations, including the monorail station, parking areas, and main entrances, ensuring easy accessibility for all visitors.

9.1 Maps for Easy Navigation

The MGM Grand map PDF is designed to simplify exploration, offering a detailed layout of the property. Color-coded sections and clear labels help visitors identify key areas like hotel towers, casinos, dining venues, and entertainment spaces. The map highlights important landmarks and pathways, ensuring guests can move seamlessly between attractions. Zoomable features allow users to focus on specific zones, while interactive elements provide real-time directions. Whether you’re locating a restaurant, finding the nearest elevator, or navigating to the monorail station, the map ensures a stress-free experience. Its intuitive design makes it a vital tool for first-time visitors and seasoned guests alike, enhancing their overall stay at MGM Grand.

9.2 Parking and Drop-off Points

The MGM Grand map PDF provides clear guidance on parking and drop-off points, ensuring convenient access for all visitors. The main parking garage is located near the Tropicana Avenue entrance, with multiple levels offering ample space for both self-parking and valet services. Designated drop-off areas are marked near the main entrance and the west wing, reducing congestion and speeding up arrivals. Additional parking options include handicapped-accessible spaces and premium spots for a fee. The map also highlights pedestrian pathways from parking areas to key attractions, making navigation seamless. EV charging stations are available, catering to eco-friendly travelers. Parking fees and restrictions are clearly indicated, helping visitors plan their arrival efficiently.

The MGM Grand map PDF is an essential tool for navigating the resort, offering clarity and convenience. It ensures visitors make the most of their stay efficiently.

10.1 Final Tips for Using the MGM Grand Map PDF

To maximize your experience, download the MGM Grand map PDF before your visit for easy access. Familiarize yourself with key landmarks and plan your route in advance. Use the map alongside the MGM Grand app for real-time updates. Identify the nearest elevators, restaurants, and amenities to save time. Mark your favorite spots for quick reference. Check for any layout changes or updates before heading out. Visualize your path to entertainment venues, dining options, and services. Explore confidently, knowing the map is your guide. This tool ensures a seamless and enjoyable stay at MGM Grand, helping you make the most of your time.

10.2 Why the Map is Essential for Visitors

The MGM Grand map PDF is a vital tool for visitors, ensuring a stress-free experience. It provides a clear layout of the property, helping guests locate accommodations, dining, entertainment, and amenities effortlessly. With the map, visitors can plan their stay efficiently, saving time and maximizing their enjoyment. It highlights key attractions and services, making navigation seamless. The map is especially useful for first-time visitors, offering a comprehensive guide to explore the resort. By having the map handy, guests can discover hidden gems and make the most of their time at MGM Grand. It’s an indispensable resource for anyone looking to navigate and enjoy the vast offerings of the MGM Grand.

real estate award pay guide

The Real Estate Award Pay Guide provides essential insights into compliance, rates, and classifications for employers and employees in the real estate industry․ It outlines minimum wages, allowances, overtime, and classifications, ensuring fair compensation and adherence to Fair Work Commission standards․ Staying updated with the latest changes is crucial for maintaining compliance and fairness in the workplace․

1․1 Understanding the Real Estate Industry Award 2020

The Real Estate Industry Award 2020 governs the minimum employment conditions for workers in the real estate sector․ It covers wages, allowances, overtime, and classifications, ensuring fair compensation and compliance with Fair Work standards․ Employers must determine if their business falls under this award and classify employees correctly to avoid underpayment․ The award is regularly updated, with recent changes including wage increases and adjustments to allowances․ Understanding this document is crucial for both employers and employees to navigate payroll compliance and workplace rights effectively in the real estate industry․

1․2 Importance of Pay Guides in Real Estate

Pay guides are crucial for real estate businesses to ensure compliance with legal requirements and maintain fair employee compensation; They provide clarity on minimum wages, allowances, and overtime rates, helping employers avoid underpayment and legal issues․ By adhering to pay guides, real estate agencies can build trust with employees, enhance motivation, and foster a positive work environment․ Additionally, accurate pay guide implementation supports business growth by ensuring financial planning and stability, making it a cornerstone of effective workforce management in the competitive real estate industry․

1․3 Overview of Award Rates and Classifications

The Real Estate Industry Award 2020 outlines specific pay rates and classifications for employees based on their roles and experience․ These rates are structured to ensure fair compensation, with increments for seniority and qualifications․ Classifications range from administrative roles to sales and property management positions, each with defined salary scales․ The award also includes provisions for allowances, overtime, and penalty rates, ensuring comprehensive coverage of employee entitlements․ Regular updates by the Fair Work Commission maintain relevance, reflecting economic changes and industry needs, thus providing a clear framework for employers to adhere to․

Coverage and Classifications Under the Real Estate Award

This section explains which businesses and employees are covered by the Real Estate Industry Award 2020․ It details the specific classifications and roles within the industry, ensuring clear guidelines for employers to categorize staff accurately․ Proper classification is essential for applying correct pay rates and entitlements, avoiding misunderstandings or legal issues․ The award covers various real estate-related roles, from administrative staff to property managers and sales agents, providing a structured framework for fair employment practices across the sector․

2․1 Determining if Your Business is Covered

The Real Estate Industry Award 2020 applies to businesses primarily engaged in real estate activities, including sales, leasing, property management, and related services․ To determine coverage, businesses must assess whether their primary operations involve real estate transactions or property management․ Employees engaged in roles such as sales, property management, or administrative support specific to real estate are typically covered․ Businesses not primarily involved in these activities, such as peripheral services, may not fall under the award․ Accurate classification ensures compliance with award obligations for employers and employees alike․

2․2 Employee Classifications and Roles

Employee classifications under the Real Estate Award are based on roles and responsibilities․ Roles include Administrative, Sales, Property Management, and Senior or Specialist positions․ Administrative staff handle office tasks, while Sales roles focus on property transactions․ Property Management involves leasing and tenant relations․ Senior roles may include team leaders or managers․ Accurate classification ensures employees are paid correctly according to their duties and experience․ Misclassification can lead to compliance issues, so employers must carefully align roles with award-defined categories to maintain fairness and legal adherence within their organizations․ Proper classification also supports career progression and wage scalability for employees․

2․3 Understanding Pay Rates for Different Positions

Pay rates under the Real Estate Award vary based on employee roles, experience, and industry standards․ Administrative staff, sales consultants, and property managers have distinct pay scales․ Rates are determined by the Fair Work Commission and updated annually․ Full-time, part-time, and casual employees receive different hourly or annual rates․ Senior roles, like agency managers, earn higher wages due to increased responsibilities․ Understanding these classifications ensures accurate payment and compliance with the award․ Employers must align employee roles with the correct pay rates to avoid underpayment and maintain workplace fairness․ This system promotes transparency and equity across the real estate industry․

Minimum Award Pay Rates

Minimum award pay rates are the base wages set by the Fair Work Commission for real estate employees, ensuring fair compensation across roles and experience levels․

3․1 Current Minimum Wage Rates for Real Estate Employees

As of the latest updates, minimum wage rates for real estate employees are divided into levels based on experience and responsibilities․ Entry-level employees (Level 1) receive a lower rate, while senior agents (Level 3) earn higher wages․ The current hourly rates range from approximately $22․00 for junior roles to $28․00 for experienced professionals․ These rates are subject to annual reviews by the Fair Work Commission to ensure they align with market conditions and cost of living adjustments․ Employers must adhere to these rates to avoid underpayment and ensure compliance with the Real Estate Industry Award 2020․

3․2 Annual Wage Review and Increases

The Fair Work Commission conducts an annual wage review to determine adjustments to minimum pay rates under the Real Estate Industry Award 2020․ These reviews consider economic factors, inflation, and living costs to ensure wages remain fair․ Increases typically apply from July 1 each year and are implemented across all employee classifications․ Employers must update payroll systems to reflect these changes․ The process ensures wages keep pace with economic conditions, maintaining the purchasing power of real estate employees․ Staying informed about these updates is crucial for compliance and fair workplace practices․

3․3 How Minimum Rates Apply to Full-Time, Part-Time, and Casual Employees

Minimum rates under the Real Estate Industry Award 2020 vary based on employment type․ Full-time employees receive the full weekly rate, divided into hourly equivalents․ Part-time employees are paid a proportionate rate based on their scheduled hours․ Casual employees are entitled to a higher hourly rate, often including a casual loading to compensate for lack of leave entitlements․ Overtime rates also differ, with casuals typically receiving higher penalties for work beyond standard hours․ Employers must ensure correct application of these rates to avoid underpayment and maintain compliance with the Award․

Allowances and Loadings

Allowances and loadings are additional payments for specific work conditions, such as vehicle use or overtime, ensuring fair compensation for employees in the real estate industry․

4․1 Types of Allowances for Real Estate Employees

Real estate employees may receive various allowances to compensate for specific work-related expenses or conditions․ Common types include vehicle allowances for travel between properties, meal allowances for work-related meals, and overtime allowances for extended hours․ Some roles may also qualify for uniform allowances or tool allowances if required to purchase equipment․ Additionally, weekend and public holiday loadings may apply for work outside standard hours․ These allowances aim to ensure fair compensation for employees, reflecting the unique demands of their roles in the real estate industry․ Employers must adhere to award guidelines when determining eligibility and payment amounts․ Proper documentation is essential for compliance․

4․2 Calculation of Allowances and Loadings

Allowances and loadings under the Real Estate Award are calculated based on specific rates and conditions․ Employers must use the official pay guide to determine the correct amounts for each type of allowance․ Loadings, such as for overtime or weekend work, are typically expressed as percentages of the employee’s base rate․ Calculations must align with the award’s provisions to avoid underpayment․ Employers should also consider the Fair Work Commission’s guidelines to ensure accuracy․ Proper documentation and regular audits are essential to maintain compliance and verify that payments are correctly applied․ This ensures fairness and transparency for all employees․

4․3 Specific Allowances for Real Estate Agents

Real estate agents may be entitled to specific allowances under the award, such as motor vehicle allowances, mobile phone allowances, and client entertainment allowances․ These are designed to cover work-related expenses․ For instance, motor vehicle allowances compensate agents for travel between properties, while mobile phone allowances offset the cost of work-related calls and data usage․ Client entertainment allowances may apply when agents incur expenses entertaining clients․ The specific rates and conditions for these allowances are outlined in the pay guide, ensuring they align with industry standards and workplace requirements․ Accurate documentation and compliance with the Fair Work Commission’s guidelines are essential․

Overtime and Penalty Rates

Overtime and penalty rates apply to real estate employees working beyond standard hours or on weekends/public holidays․ These rates ensure fair compensation for additional or unsocial work hours․

5․1 Overtime Pay Rates for Real Estate Employees

Overtime pay rates for real estate employees are determined by the Real Estate Industry Award 2020․ Employees working beyond standard hours or outside typical working times are entitled to overtime․ For the first two hours of overtime, the rate is 1․5 times the base rate, while any additional hours beyond that attract double the base rate․ Overtime applies to work performed on weekends, public holidays, or beyond the standard 38-hour workweek․ Employers must ensure accurate calculation and payment of overtime to maintain compliance with the Award and avoid penalties․

5․2 Penalty Rates for Weekend and Public Holiday Work

Penalty rates for weekend and public holiday work are higher than standard pay rates under the Real Estate Industry Award 2020․ Work on Saturdays attracts a 1․5x base rate, while Sundays and public holidays are paid at 2x the base rate․ These rates compensate employees for working during less desirable times․ Employers must apply these penalties to ensure compliance with the Award․ Penalty rates do not apply to overtime hours worked on these days, as overtime rates are calculated separately․ Accurate application of these rates is essential to avoid underpayment and ensure fairness for employees․

5․3 Calculating Overtime and Penalty Rates

Calculating overtime and penalty rates involves applying specific multipliers to an employee’s base rate․ Overtime is paid at 1․5x the base rate for the first two hours and 2x for any additional hours․ Penalty rates for weekends and public holidays are added to the base rate or overtime rate․ For example, Saturday work is 1․5x, and Sunday or public holiday work is 2x․ Employers must ensure accurate calculations to comply with the Award and avoid underpayment․ Record-keeping is essential to verify correct payments and handle any disputes effectively․

Compliance with the Real Estate Award

Compliance with the Real Estate Award ensures fair pay and legal adherence․ Employers must prioritize payroll accuracy, correct employee classification, and proper record-keeping to avoid penalties and disputes․

6․1 Ensuring Payroll Compliance

Ensuring payroll compliance with the Real Estate Award requires accurate payment of wages, allowances, and penalties․ Employers must understand and apply the correct award rates, ensuring timely payments and maintaining precise records․ Regular audits of payroll systems help identify and rectify discrepancies․ Compliance also involves adhering to Fair Work regulations and staying updated on award changes․ Non-compliance can lead to penalties, damaging business reputation and finances․ Utilizing payroll software and consulting Fair Work resources can streamline compliance and ensure transparency in wage management for real estate businesses․

6․2 Correct Employee Classification to Avoid Underpayment

Accurate employee classification is crucial to prevent underpayment and ensure compliance with the Real Estate Award․ Misclassification can lead to legal risks and financial penalties․ Employers must understand the award’s classification structure, which defines roles based on responsibilities and experience․ Regularly reviewing job roles and duties ensures employees are placed in the correct classification․ Employers should consult the Fair Work Commission or HR professionals to verify classifications․ Correct classification safeguards employees’ entitlements and maintains trust and fairness in the workplace, aligning with legal and ethical standards․

6․3 Record-Keeping Requirements for Employers

Employers must maintain accurate and detailed records to comply with the Real Estate Award and Fair Work Act․ Records include pay slips, time sheets, leave balances, and employment contracts․ Employers must keep these records for seven years and ensure they are easily accessible․ Accurate documentation helps prevent disputes and ensures compliance with audit requirements․ Employers who fail to maintain proper records risk penalties and legal action․ Regular reviews of record-keeping systems are essential to ensure compliance and avoid potential issues with employees or regulatory bodies․

Recent Changes to the Real Estate Award

The Real Estate Award has seen updates to minimum wages, new job classifications, and adjustments to allowances and penalty rates, impacting operational and financial planning․

7․1 Updates to Minimum Award Rates

The Fair Work Commission has implemented annual wage reviews, resulting in increases to minimum award rates for real estate employees․ The latest changes aim to align wages with living costs and market conditions․ Full-time, part-time, and casual employees benefit from these adjustments, with percentage-based increases applied uniformly across classifications․ Employers are required to adopt these updated rates to maintain compliance․ The adjustments reflect economic factors and industry feedback, ensuring fair compensation․ For precise figures, employers should refer to the most recent Fair Work Commission resources and updated pay guides․

7;2 Changes in Allowances and Penalty Rates

Recent updates to the Real Estate Award include adjustments to allowances and penalty rates․ Specific allowances, such as vehicle or travel allowances, have been revised to reflect current costs․ Penalty rates for weekend and public holiday work have also been modified to align with industry standards and workforce demands․ These changes ensure equitable compensation for employees working outside standard hours․ Employers must review and implement these updates to avoid non-compliance․ The Fair Work Commission provides detailed breakdowns of these adjustments in the latest pay guide resources․

7․3 Impact of Wage Increases on Real Estate Businesses

Wage increases under the Real Estate Award can significantly impact businesses, particularly small and medium-sized agencies․ Higher labor costs may lead to financial pressure, requiring adjustments to budget allocations․ Agencies might need to review commission structures or implement efficiency measures to absorb these costs․ However, fair compensation can enhance employee morale and retention, potentially improving service quality and client satisfaction․ Businesses must balance wage compliance with operational sustainability to maintain profitability and competitiveness in the market․ Staying informed about wage adjustments is crucial for long-term planning and adaptation․

Industry Impact of the Real Estate Award

The Real Estate Award significantly influences industry dynamics, affecting operational costs, competition, and service standards; It shapes business strategies and market adaptability, ensuring fair practices and sustainable growth․

8․1 Effects on Real Estate Agencies and Agents

The Real Estate Award directly impacts agencies by influencing operational costs and compliance requirements, while agents face changes in remuneration and role expectations․ Agencies must adapt to wage increases, potentially altering business strategies to maintain profitability․ Agents benefit from standardized pay rates and clearer career progression pathways․ The award also prompts agencies to review staffing models, ensuring alignment with market demands․ These changes can enhance industry professionalism, fostering trust and improving service quality․ Ultimately, the award drives a more competitive and adaptive real estate sector․

8․2 Impact on Employee Motivation and Retention

Fair and transparent pay structures under the Real Estate Award enhance employee motivation and retention; Standardized rates ensure employees feel valued, reducing turnover and boosting morale․ Clear career progression pathways encourage agents to stay and grow within agencies․ Competitive wages and allowances also attract top talent, fostering a skilled workforce․ By meeting legal obligations, agencies build trust and credibility, creating a positive work environment․ This directly contributes to higher job satisfaction and long-term employee loyalty, benefiting both individuals and the business․

8․3 Influence on Client Trust and Business Growth

Compliance with the Real Estate Award fosters client trust by demonstrating professionalism and ethical business practices․ Fair pay practices enhance employee performance, leading to better client service and satisfaction․ Satisfied clients are more likely to recommend agencies, driving business growth․ Additionally, transparent pay structures align with client expectations of integrity, strengthening agency reputations․ By adhering to award standards, businesses can differentiate themselves in a competitive market, attracting both clients and top talent․ This dual benefit supports long-term business sustainability and expansion․

Tools and Resources for Understanding the Pay Guide

The Fair Work Ombudsman provides detailed guidelines and resources to navigate the Real Estate Award․ Employers can access the official Pay Guide PDF, online wage calculators, and employer checklists to ensure compliance and accuracy in pay calculations․ Additionally, industry-specific tools and webinars offer practical insights, helping businesses stay informed and up-to-date with the latest award requirements․ These resources are essential for maintaining compliance and avoiding potential penalties․

9․1 Fair Work Commission Resources

The Fair Work Commission offers essential resources to understand the Real Estate Award Pay Guide․ Employers can access the official Pay Guide document, which outlines all rates, classifications, and allowances․ The Fair Work Ombudsman website provides interactive tools, such as the Pay and Conditions Tool, to calculate correct wages and entitlements․ Additionally, the Commission offers templates and guides to help businesses comply with the award requirements․ These resources ensure clarity and accuracy, helping employers avoid non-compliance issues and maintain fair workplace practices․

9․2 Pay and Conditions Tool for Real Estate

The Fair Work Ombudsman provides the Pay and Conditions Tool, an interactive resource for real estate employers and employees․ This tool helps calculate accurate pay rates, allowances, and entitlements under the Real Estate Award․ Users can input specific details like role, hours, and location to determine correct payments․ It also clarifies overtime, penalty rates, and loadings․ The tool is updated regularly to reflect award changes, ensuring compliance․ It’s a valuable resource for preventing underpayment and misclassification issues, promoting fair workplace practices․ Employers can rely on it for precise calculations and adherence to legal obligations․

9․3 Where to Find the Latest Pay Guide PDF

The latest Real Estate Award Pay Guide PDF can be downloaded from the Fair Work Commission’s official website․ Visit the site, navigate to the “Awards” section, and search for the Real Estate Industry Award 2020․ The PDF provides detailed pay rates, classifications, and allowances․ It’s updated annually to reflect wage increases and changes․ Employers and employees can also contact the Fair Work Infoline for assistance․ Always refer to the most recent version to ensure compliance with current rates and conditions․

Common Mistakes to Avoid

Common mistakes include misclassification of employees, underpayment of wages, and non-compliance with record-keeping requirements․ Employers must ensure accurate payroll processes and adhere to award standards․

10․1 Misclassification of Employees

One of the most common mistakes employers make is misclassifying employees, leading to incorrect pay rates or entitlements․ This often occurs when employees are wrongly labeled as independent contractors or placed in the wrong award category․ Real estate businesses must ensure accurate classification based on roles and responsibilities to avoid legal penalties․ Misclassification can result in underpayment, FWC investigations, or fines․ Employers should regularly review employee roles and consult the Real Estate Industry Award 2020 to ensure compliance and prevent costly errors․ Proper classification is essential for maintaining fair workplace practices and avoiding disputes․

10․2 Underpayment of Wages and Allowances

Underpayment of wages and allowances is a serious issue that can lead to legal consequences for employers․ It often occurs due to incorrect interpretations of the Real Estate Industry Award or failure to apply the latest pay rates․ Employers must ensure all employees receive the correct minimum rates, overtime, and allowances as specified․ Regular audits of payroll systems and staying updated on award changes can prevent underpayment․ Non-compliance may result in fines, reputational damage, and employee distrust․ Accurate payment practices are essential for maintaining compliance and fair workplace standards․

10․3 Non-Compliance with Record-Keeping Requirements

Non-compliance with record-keeping requirements can result in significant penalties for employers․ The Real Estate Industry Award mandates accurate and detailed records of employee payments, hours, and leave․ Failure to maintain these records can lead to fines and legal action․ Employers must ensure all payroll data is up-to-date and easily accessible for audits․ Incomplete or inaccurate records can also complicate wage disputes and inspections․ Regularly reviewing and updating records helps prevent non-compliance and ensures transparency in payroll processes, protecting both employers and employees from potential issues․

Case Studies and Examples

Case studies highlight real-life scenarios demonstrating compliance with the Real Estate Award Pay Guide․ Examples include successful payroll management, accurate wage calculations, and corrective actions for underpayments․

11․1 Real Estate Agency Compliance Success Stories

Several real estate agencies have successfully implemented the Real Estate Award Pay Guide, ensuring accurate wage calculations and compliance․ One agency streamlined payroll processes, reducing errors and improving transparency․ Another implemented a system to track hours and allowances, preventing underpayments․ These actions boosted employee morale and trust, while avoiding legal risks․ Regular audits and training sessions were key to their success․ Such examples demonstrate how adherence to the pay guide fosters a positive workplace culture and operational efficiency, benefiting both employers and employees․

11․2 Examples of Correct Pay Rate Calculations

Correct pay rate calculations under the Real Estate Award ensure fair compensation for employees․ For instance, a full-time real estate salesperson earning the minimum rate of $58․04 per hour (as of 2023) would receive $1,161․92 for a 38-hour workweek․ Part-time employees are paid proportionally, while casuals receive a 25% loading․ Overtime rates, such as double time for work exceeding 38 hours, must also be applied․ Employers should refer to the Fair Work Commission’s pay guide to ensure accurate calculations and avoid underpayment issues․

11․3 Practical Scenarios for Allowances and Overtime

Practical scenarios illustrate how allowances and overtime apply in real estate roles․ For example, a property manager earning $58․04/hour may receive a motor vehicle allowance of $0․88 per kilometer for work-related travel․ If they work overtime on a Saturday, they are entitled to time-and-a-half, totaling $87․06/hour․ A part-time sales agent working 10 hours on a Sunday would receive double time, amounting to $116․08/hour․ These scenarios highlight the importance of applying correct rates to ensure fairness and compliance with the Real Estate Award․

The Real Estate Award Pay Guide ensures fair compensation and compliance, adapting to industry changes․ Staying informed about updates is crucial for sustainable business growth and employee satisfaction․

12․1 Summary of Key Points

The Real Estate Award Pay Guide outlines essential pay rates, classifications, and compliance requirements for the industry․ It ensures fair wages, including minimum rates, allowances, and overtime pay, while addressing employee classifications and record-keeping․ Employers must stay updated on annual wage reviews and changes to avoid underpayment or legal issues․ The guide also emphasizes the importance of correct employee classification and adherence to Fair Work standards․ By following the pay guide, businesses can maintain compliance, foster employee satisfaction, and support industry growth․ Regular updates ensure the guide remains relevant to evolving workplace needs and regulations․

12․2 Future Trends in Real Estate Pay Rates

Future trends in real estate pay rates may include increased automation in roles like property management, potentially altering wage structures․ Remote work could influence pay scales, with location-based adjustments becoming less relevant․ There may also be a greater emphasis on performance-based incentives to attract top talent․ Economic factors, such as inflation and policy changes, will likely shape wage growth․ Additionally, industry bodies may introduce more flexible pay models to adapt to evolving market demands and technological advancements․ Staying informed about these trends will be crucial for both employers and employees․

12․3 Importance of Staying Informed

Staying informed about the Real Estate Award Pay Guide is crucial for compliance and avoiding penalties․ Employers must monitor updates to minimum wages, allowances, and classifications to ensure accurate payroll processing․ Employees benefit by understanding their entitlements, preventing underpayment․ Industry trends, economic changes, and regulatory updates can impact pay rates and conditions․ Regularly reviewing resources like the Fair Work Commission and the latest pay guides ensures businesses adapt to changes and maintain trust with clients and employees․ Proactive knowledge helps navigate the evolving landscape effectively․